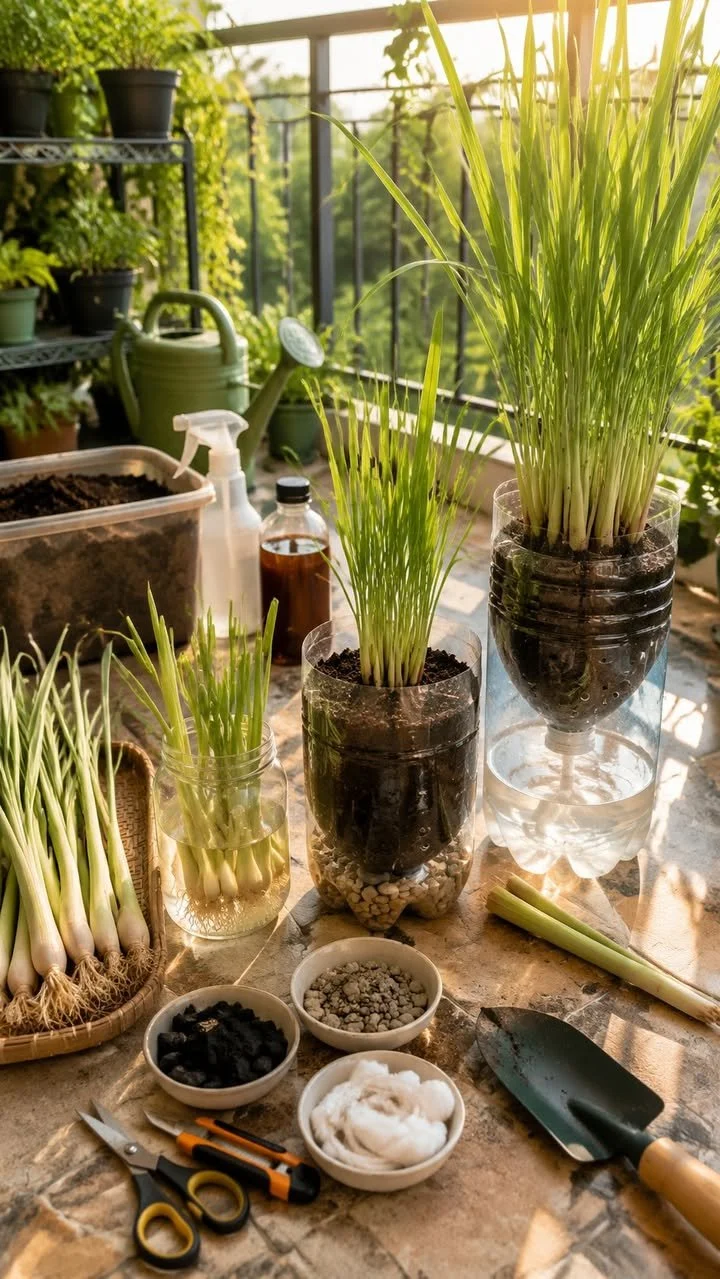
How to Root and Grow Lemongrass in Bottles at Home
Do you love the fragrant, zesty flavor of lemongrass in your meals? Imagine being able to grow your own fresh lemongrass right at home, even if you have limited space! More and more plant lovers are discovering the joy of cultivating their herbs, and lemongrass is one of the easiest and most rewarding plants to grow in bottles. In this guide, you’ll learn how to root and grow lemongrass in bottles at home—no garden required.
Why This Works
Growing lemongrass in bottles is not just a fun and creative task; it’s also an efficient way to enjoy fresh herbs while enhancing your home decor. Lemongrass thrives in a controlled environment where its roots have plenty of water and nutrients. By using bottles, you can create a mini garden that requires minimal maintenance and can easily fit on a windowsill or countertop.
Step-by-Step Guide
Here’s a comprehensive, step-by-step breakdown to help you successfully root and grow lemongrass in bottles:
1. Gather Your Materials
Before you get started, gather the following items:
- Lemongrass stalks: You can find these at your local grocery store or Asian market. Choose stalks that are fresh and green.
- Bottles: Clear plastic or glass bottles work best. Look for bottles with a wide neck for easier access to the plants.
- Water: Use distilled water or tap water that has been left to sit for 24 hours to let chlorine dissipate.
- Nutrients (optional): Liquid fertilizer can boost growth, but it’s not necessary for initial rooting.
2. Prepare the Lemongrass
- Trim the Stalks: Cut each lemongrass stalk to about 6-8 inches long. Ensure you have some of the white base intact as this part is crucial for rooting.
- Remove Excess Leaves: If the stalk has long leaves, trim them back to about 1/3 of their height to reduce evaporation.
3. Place Lemongrass in Bottles
- Add Water: Fill your bottle with enough water to cover the base of the lemongrass stalks but leave the tops exposed.
- Position the Stalks: Insert the trimmed lemongrass stalks into the bottle so the base is submerged.
4. Provide Proper Care
- Choose a Sunny Spot: Place your bottle in a location that receives plenty of sunlight—lemongrass loves bright light!
- Change the Water Regularly: To avoid stagnation, change the water every few days. This keeps the roots healthy and promotes growth.
- Add Nutrients (Optional): If you choose to, you can add a diluted liquid fertilizer every two weeks to enhance growth.
5. Transplanting
Once your lemongrass stalks have developed roots that are at least 3 inches long, you can transplant them into pots with soil or keep them in bottles if you prefer a decorative look.
Expected Results
In just a few weeks, you’ll notice your lemongrass growing new shoots and leaves! Not only will you have a beautiful and functional plant, but you’ll also enjoy the satisfaction of having grown it yourself. Freshly harvested lemongrass can elevate your culinary creations, lending rich flavor to soups, teas, and marinades.
Extra Tips
- Propagation: Lemongrass is quite hardy. You can propagate new plants from the harvested stalks, ensuring a continuous supply.
- Pest Management: Keep an eye out for pests. If you notice any symptoms, treat your plants with mild soap or neem oil.
- Enjoy the Aroma: In addition to its culinary uses, lemongrass provides a pleasant scent. Place bottles near seating areas for a refreshing aroma in the air.
Conclusion
Growing your own lemongrass doesn’t have to be complicated or space-consuming. With just a few simple steps and some minimal supplies, you can cultivate this aromatic herb at home, enhancing your meals and your living space. Not only will you enjoy fresh lemongrass, but you’ll also nurture a rewarding hobby. So grab your bottles, and let’s get growing! 🌱