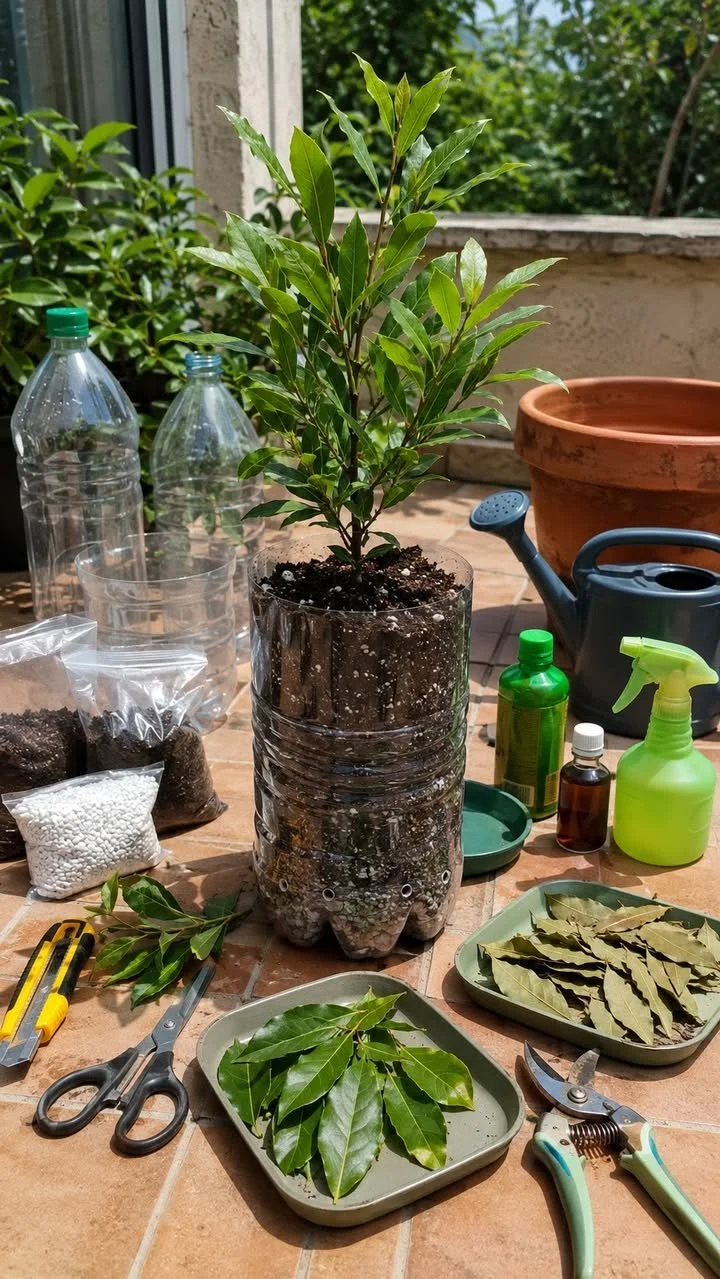
Sustainable Bay Leaf Tree Care in Plastic Bottles
Are you short on space but longing to grow your own herbs? Perhaps you’re looking to make a positive impact on the environment through sustainable gardening. Meet the bay leaf tree, also known as Laurus nobilis—an aromatic staple in both the kitchen and your home decor. While most might think of large pots or garden beds for growing this Mediterranean delight, you’ll be surprised to learn that you can easily cultivate it in recycled plastic bottles! By using this eco-friendly approach, you can create a productive green corner in even the tiniest of spaces. Let’s explore how to care for your bay leaf tree while promoting sustainability!
Why Grow Bay Leaf Trees in Plastic Bottles?
Plastic bottles are everywhere, lightweight, and remarkably versatile. By repurposing these common items into planters, you not only reduce landfill waste but also create an economical setup for your herb garden. Bay trees, known for being slow-growing with shallow root systems, thrive particularly well in bottle containers during their early stages, making this method ideal for:
- Small spaces like windowsills, patios, or balconies
- Sustainable gardening using upcycled materials
- Indoor or semi-outdoor herb growing in compact areas
- Beginners looking to grow herbs without large containers or garden beds
Materials You Will Need
Before you dive in, gather these materials:
- A large plastic bottle (at least 2-liter capacity)
- Sharp utility knife or scissors
- Well-draining potting soil (preferably with sand or perlite)
- Bay leaf tree seedling or cutting
- Small stones or gravel (for drainage)
- A saucer or tray to catch water
- Optional: compost or organic fertilizer
Preparing the Plastic Bottle Planter
Choose the Right Bottle
Select a sturdy, transparent or semi-transparent plastic bottle, like a 2-liter soda bottle or water jug. Rinse it thoroughly to eliminate any residue.
Cut and Shape
Cut off the top third of the bottle horizontally to create an open planter. For a self-watering version, you can invert the cut top and place it back into the base, forming a reservoir. Adding a cloth wick through the cap can help draw moisture up from the bottom.
Drainage Setup
Poke several small holes in the bottom of the bottle to permit excess water to escape. Lay a thin layer of gravel or pebbles at the base to enhance drainage.
Add Soil
Fill the container with a well-draining potting mix. A good blend is equal parts potting soil, sand, and organic compost or perlite.
Planting the Bay Leaf Tree
Whether you start with a seedling or a rooted cutting, ensure that your plant is healthy and disease-free. Gently transfer it into the soil, burying the root ball just beneath the surface, and firm the soil around it. Remember, bay trees grow slowly and prefer not to be disturbed, so allow their roots to establish well before considering repotting.
Sunlight and Positioning
Bay trees thrive under bright conditions. Place your bottle planter in a location that receives at least six hours of bright, indirect light each day. Indoors, a sunny windowsill or balcony ledge works wonders. Outdoors, make sure to protect the plant from strong winds to prevent it from toppling over or drying out.
Watering and Feeding
Water the bay leaf tree once the top inch of soil feels dry. It’s essential to avoid overwatering, as plastic containers retain moisture more than clay pots do. Ensure your drainage setup is effective to prevent root rot.
Feed your bay tree with a diluted organic liquid fertilizer or compost tea once a month during the spring and summer months. In autumn and winter, you can decrease feedings to once every two months or forgo it entirely.
Pruning and Maintenance
Keep your bay leaf tree in shape by pruning lightly to encourage bushier growth. Pinch back the tips of young branches to stimulate side shoots, and don’t hesitate to remove any dead or yellowing leaves. Once the plant is well-established, feel free to harvest leaves as needed—fresh or dried, they add culinary flair! To dry harvested leaves, place them in a shaded, airy spot for a few days before storing them in an airtight container.
Repotting and Long-Term Care
As your bay tree grows, it may outgrow the bottle. When roots start circling at the bottom or pushing against the sides, it’s time to transfer the plant to a slightly larger container or cut open the existing bottle to transplant it into a new setup. Even after transplanting, you can continue to use plastic bottles for new seedlings or cuttings to maintain your sustainable gardening efforts.
Pest and Disease Tips
Bay trees are generally resistant to pests, but occasionally you may encounter aphids or scale insects. A gentle rinse with water can usually take care of them, or you may choose to apply neem oil. Always avoid soggy conditions to prevent fungal issues, letting the soil dry slightly between waterings.
Final Thoughts
Growing a bay leaf tree in a plastic bottle offers a sustainable and smart approach to home gardening. This method provides an ideal solution for those with limited space while allowing you to reuse materials that would otherwise contribute to waste. With the right care—a sunny spot, well-draining soil, and moderate watering—your bay tree can flourish and provide aromatic leaves for your culinary adventures for years to come. Whether you’re cultivating herbs on a balcony or turning kitchen waste into green life, a bay leaf tree in a bottle is both eco-friendly and incredibly rewarding!