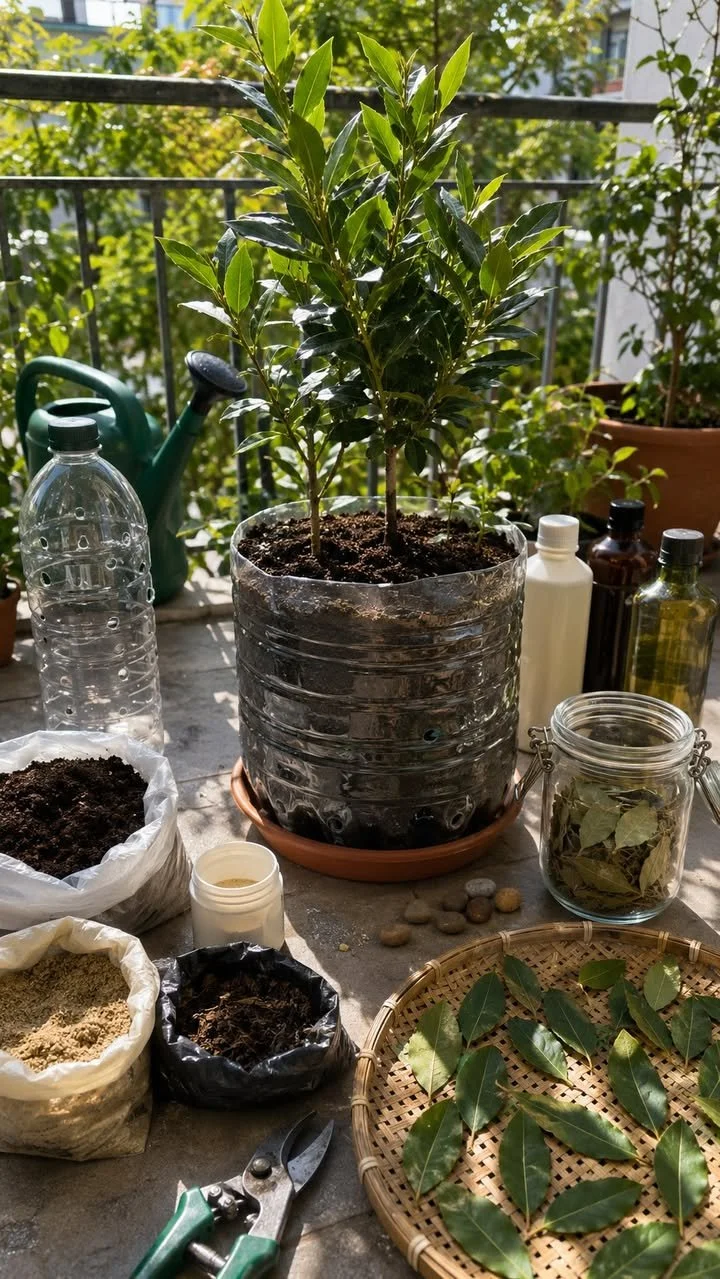
The Ultimate Guide to Growing Container Bay Leaves Using Recycled Bottles
Are you tired of spending money on fresh bay leaves, only to find that they wilt within days? Imagine having your own supply of fragrant bay leaves right at your fingertips—all while doing your part to reduce plastic waste. This comprehensive growing guide will teach you how to cultivate bay leaves using simple recycled bottles. Get ready to transform your culinary experience without costing the earth!
Why This Works
Growing bay leaves in containers, especially using recycled materials, is not just an eco-friendly choice; it also allows you to control the environment of your herbs. By repurposing plastic bottles, you can create a mini-greenhouse effect that traps warmth and moisture, ideal for bay leaf growth. Additionally, using containers means you can control soil quality, drainage, and other factors crucial for plant health.
How to Grow Bay Leaves in Recycled Bottles
Step 1: Gather Your Supplies
Before you dive into the planting process, you’ll need to gather materials. Here’s what you’ll need:
- Recycled plastic bottles: A 2-liter soda bottle or larger works best.
- Potting soil: A quality mix with good drainage.
- Bay leaf seeds or seedlings: You can purchase seeds online or at local garden stores.
- Scissors or a utility knife: For cutting the bottles.
- A small rock or gravel: To ensure proper drainage at the bottom of your containers.
- A watering can or spray bottle: For keeping the soil moist.
Step 2: Prepare the Bottles
- Wash the bottles thoroughly with soap and water to remove any residue.
- Cut the bottle in half, keeping the bottom portion intact for planting. The top part can be used as a removable cover.
- Create drainage holes in the bottom of the container by poking small holes with scissors or a utility knife. This step ensures that excess water can escape, preventing root rot.
Step 3: Fill with Soil
- Add a layer of small rocks or gravel at the bottom of your bottle for drainage.
- Fill the bottle with potting soil, leaving about an inch of space from the top. This will help prevent soil from spilling out when you water your plant.
Step 4: Plant Your Bay Leaf Seeds or Seedlings
- If you’re using seeds, plant them about 1 inch deep in the soil and cover them lightly.
- If you’re transplanting a seedling, create a hole in the soil with your finger, place the seedling in, and gently pack the soil around it.
Step 5: Water and Provide Light
- Water the soil thoroughly, ensuring it’s moist but not soggy. A spray bottle can help you achieve even moisture.
- Place your container in a location that receives at least 6-8 hours of sunlight per day—a sunny windowsill is ideal.
Step 6: Maintain Your Plant
- Water your bay leaf plant regularly, allowing the top of the soil to dry between waterings.
- Fertilize with a diluted liquid fertilizer every 4-6 weeks during the growing season to encourage growth.
- Rotate your container occasionally to ensure even sunlight exposure.
Expected Results
With proper care, your bay leaf plant should thrive and begin producing leaves in a few months. As your plant grows, you’ll be able to snip fresh leaves whenever you need them—perfect for adding rich flavor to soups, stews, and marinades. Plus, you’ll enjoy the satisfaction of nurturing a plant from seed to kitchen!
Extra Tips
- If you notice your plant becoming leggy or stretched out, it may not be getting enough light. Consider moving it to a brighter location.
- Avoid over-fertilizing, as this can burn the roots and lead to poor growth.
- Harvest selectively; snip older leaves regularly to encourage new growth and keep your plant healthy.
Conclusion
By growing your own bay leaves in recycled bottles, you’re not only saving money but also contributing to a more sustainable lifestyle. You’ll enjoy the aromatic benefits of fresh bay foliage, enhance your cooking, and feel the pride of caring for your own herb garden. Now’s the time to start! So grab those bottles, and get ready to cultivate your very own bay leaf plant. Happy gardening!