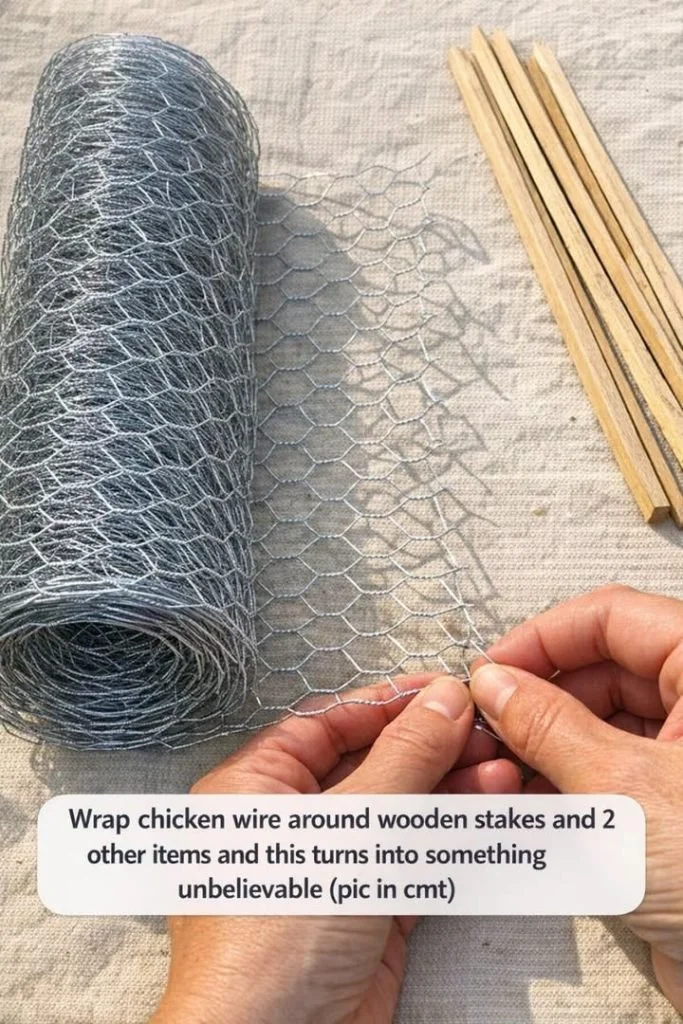
Transform Your Space: Create a Stunning Living Moss Wall Planter with Just Three Items!
Are you searching for a refreshing way to bring nature into your home without using up valuable floor space? Look no further! A living moss wall planter is an elegant DIY project that blends rustic charm with modern minimalist design. With just a few inexpensive materials—chicken wire, wooden stakes, and moss—you can craft a vertical garden that turns any room into a tranquil, nature-inspired retreat. Not only does a moss wall bring vibrant greenery and rich texture, but it also serves as a unique centerpiece that requires minimal maintenance. Whether you’re sprucing up your living room, office, hallway, or apartment, this effortless project infuses warmth and organic beauty into any interior space.
Why You’ll Love This DIY Project
This living moss wall planter is:
- Simple to build using inexpensive materials.
- Ideal for smaller spaces, making it perfect for apartments.
- A beautiful alternative to traditional wall art, bringing the outdoors in.
- Customizable to complement any decorating style.
- Beginner-friendly, with little DIY experience required.
- A great weekend project that can be completed in just a few hours.
Materials You’ll Need
Here’s your shopping list for this elegant moss wall planter:
- 1 roll of chicken wire (approximately 3 feet long)
- 4 wooden stakes (about 2 feet long each)
- Fresh sheet moss or preserved moss (enough to cover a 3 ft × 2 ft surface)
- Wire cutters
- Heavy-duty gloves
- Staple gun or small nails (optional)
- Wall hooks or mounting hardware
Step-by-Step Guide
Step 1: Prepare the Chicken Wire
Start by laying the chicken wire flat on a stable work surface. Make sure to wear heavy-duty gloves while handling it, as the cut edges can be sharp. Trim the chicken wire to your desired dimensions using the wire cutters.
Step 2: Build the Wooden Frame
Position the four wooden stakes parallel to one another across the chicken wire. Space them evenly to create a strong support structure. Fold the edges of the chicken wire around each wooden stake, pulling the wire tightly to form a robust frame. Use wire cutters to trim away any excess wire, and bend sharp ends inward to minimize the risk of scratching yourself.
Step 3: Attach the Moss
Carefully spread the moss evenly across the chicken wire frame. Fresh sheet moss imparts a lush, living aesthetic, while preserved moss provides an almost maintenance-free option. Gently press the moss into the wire openings, tucking portions beneath the wire loops to ensure it stays securely in place. If necessary, use small pieces of floral wire to hold thicker sections of moss against the frame.
Step 4: Install Hanging Hardware
Lastly, attach sturdy hooks, picture hangers, or mounting brackets to the back of the wooden stakes. Ensure they are evenly spaced so that the planter hangs straight. Double-check that all moss sections are secure and that no sharp wire ends remain exposed before hanging.
Where to Display Your Moss Wall
This eye-catching moss wall can beautifully enhance various locations in your home, such as:
- Living rooms
- Entryways
- Bedrooms
- Home offices
- Reading corners
- Covered patios
Select a spot with bright, indirect light; be cautious as prolonged direct sunlight may dry out fresh moss more quickly.
Creative Ways to Customize It
Once you’ve mastered the basic design, the possibilities for personalizing your moss wall are endless:
- Add small air plants between sections of moss for an extra touch of life.
- Incorporate miniature succulents for added texture and visual interest.
- Paint or stain the wooden stakes to harmonize with your décor.
- Mix different moss varieties for unique shades of green.
- Include decorative driftwood, stones, or preserved branches for added flair.
- Create geometric patterns using contrasting moss colors for a dynamic effect.
With just a few creative touches, your handmade planter becomes a striking statement piece that seamlessly blends nature and modern interior design.
Caring for Your Moss Wall
Maintenance varies depending on your choice of moss:
Fresh Moss
- Lightly mist periodically if the moss begins to dry, adjusting based on the specific moss species and your indoor environment.
- Ensure it is kept away from heating vents and direct sunlight.
- Promote good air circulation around the moss.
Preserved Moss
- Needs no watering; simply dust gently with a soft brush or compressed air.
- Keep it away from excessive humidity or direct sunlight to maintain its appearance.
Helpful Tips
- Always wear gloves when working with chicken wire.
- Choose untreated wooden stakes if you prefer a more natural look.
- Test your wall anchors before hanging heavier frames to prevent falls.
- Keep the finished planter away from areas with constant moisture.
- If using live moss, select species suited for indoor conditions and follow their specific care requirements.
Final Thoughts
Building a DIY living moss wall planter is not only easy but also a rewarding project that blends simple materials with creative design. Using chicken wire, wooden stakes, and moss, you can create a stunning vertical display that introduces texture, color, and a soothing natural atmosphere to any room. Whether you opt for fresh living moss or preserved varieties, this project presents endless customization opportunities while bringing a timeless touch of nature into your home. So why wait? Start your moss wall today and transform your space into a serene sanctuary!