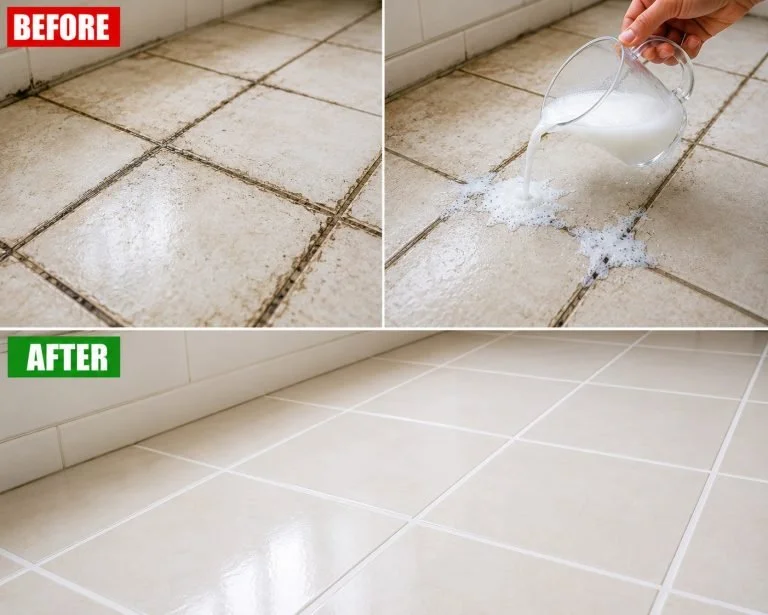
How to Clean Tile Grout and Make Your Floors Look Like New
Tile floors can maintain their beauty for years, but the grout lines between the tiles often succumb to wear much earlier. As a naturally porous material, grout can trap dirt, grease, soap residue, and moisture over time, causing light-colored grout to gradually become gray, brown, or even darker than the surrounding tiles.
Kitchens, bathrooms, and entryways are particularly vulnerable. Cooking oils and food particles can settle into grout lines in the kitchen, while bathrooms experience moisture buildup conducive to mildew growth. Entryways accumulate dirt and debris from outside, further dulling grout‘s appearance. Unfortunately, even routine mopping may not completely remove embedded grime and can sometimes spread it around if the water becomes dirty.
The good news is that heavily stained grout doesn’t always need to be replaced. With patience, the right cleaning techniques, and a few common household supplies, you can often restore much of its original appearance.
What You’ll Need
Many grout-cleaning tasks can be accomplished using basic household supplies. Gather the following:
- Warm water
- Baking soda
- White vinegar (avoid on natural stone surfaces like marble, limestone, travertine, or slate)
- Mild dish soap
- Hydrogen peroxide for stubborn stains
- Small stiff nylon brush or old toothbrush
- Microfiber cloths
- Bucket
- Spray bottle
- Rubber gloves
Step 1: Remove Loose Dirt
Start by thoroughly sweeping or vacuuming the entire floor. This crucial first step prevents scratching during cleaning and allows your cleaning solution to work directly on the stained grout. Pay special attention to corners, edges, and areas around baseboards where dirt commonly accumulates.
Step 2: Prepare a Gentle Cleaning Paste
Mix baking soda with a small amount of water until it forms a thick paste. Apply this paste directly onto the grout lines, ensuring they are completely covered. Allow it to sit for several minutes to help loosen the embedded dirt. For greasy kitchen grout, adding a few drops of mild dish soap to the mixture can break down oily residue effectively.
Step 3: Scrub the Grout
Using a stiff nylon brush or an old toothbrush, scrub along each grout line with short back-and-forth motions. Work in small sections instead of attempting to clean the entire floor at once. This makes rinsing easier and prevents the cleaning mixture from drying on the surface. Be careful not to apply excessive force, especially if your grout is old or beginning to degrade.
Step 4: Rinse Thoroughly
Once you’ve loosened the dirt, wipe the area with a damp microfiber cloth or rinse with clean water. Change your rinse water frequently to avoid redistributing dirt back onto the floor. After rinsing, dry the cleaned area with a clean towel or microfiber cloth. Dry grout makes it easier to spot any remaining stained areas that may require another round of cleaning.
Step 5: Address Stubborn Stains
Some grout stains may have developed over many months or years and may not disappear after a single cleaning. For persistent discoloration, hydrogen peroxide or other grout-safe cleaners can enhance the appearance. Always test any stronger cleaning solution in a small, inconspicuous area first to ensure it will not damage the grout or tile finish. Multiple gentle cleaning sessions tend to be safer than relying on highly aggressive methods that could harm the grout.
How to Help Prevent Future Grout Stains
Once your grout is clean, regular maintenance is crucial to keep it looking fresh. Consider the following tips:
- Sweep or vacuum frequently.
- Mop using clean water and change dirty water as needed.
- Dry bathroom floors after showers.
- Clean spills promptly.
- Improve ventilation in damp areas.
- Place entry mats at exterior doors to minimize tracked-in dirt.
- After cleaning, some homeowners choose to apply a grout sealer, which can reduce moisture absorption and ease future cleaning. Follow the manufacturer’s recommendations for periodic reapplication.
Common Cleaning Mistakes to Avoid
When cleaning grout, be aware of these common mistakes:
- Using abrasive metal brushes that can damage grout or scratch tile.
- Leaving cleaning products on surfaces longer than recommended.
- Mixing household cleaning products without confirming their compatibility.
- Skipping the rinsing step after scrubbing.
- Mopping with dirty water that redistributes grime.
A careful, methodical approach often yields better long-term results than using harsher cleaning methods.
Final Thoughts
Fresh, clean grout can dramatically enhance the appearance of tiled floors without the need for replacements. Bright grout lines transform kitchens, bathrooms, laundry rooms, and entryways into cleaner and more inviting spaces. By practicing regular maintenance, promptly addressing spills, and engaging in occasional deep cleaning, you can keep grout looking its best and extend the attractive appearance of your tile floors for years to come.