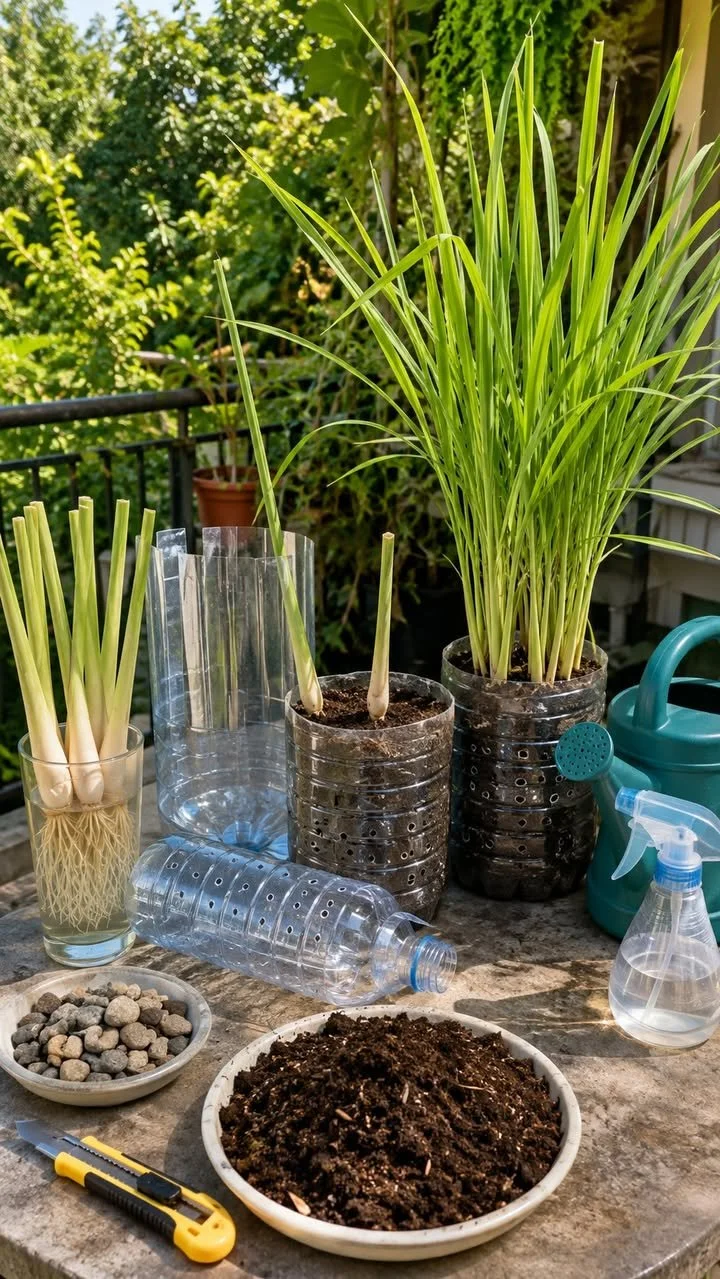
Create a DIY Lemongrass Planter Using Plastic Water Bottles
Are you tired of spending money on fresh herbs at the grocery store? Imagine having a lush supply of aromatic lemongrass growing right in your home! Not only is growing your own herbs rewarding, but it’s also a fantastic way to enhance your culinary adventures. Today, I’m excited to guide you through a simple, sustainable project: a DIY lemongrass planter using plastic water bottles. Let’s dive into this eco-friendly activity that’s as good for your kitchen as it is for the planet!
Why This Works
Lemongrass is not just easy to grow; it thrives in various environments, making it an ideal choice for indoor gardening. Plus, by using plastic water bottles, you’re giving new life to materials that might otherwise end up in a landfill. This project challenges the notion that gardening needs to be expensive or complicated. Instead, it offers a creative solution to use everyday items to cultivate fresh produce in the comfort of your home.
Main Content
Materials Required
Before you start, gather the following materials:
- Plastic water bottles (2-liter or standard size)
- Soil (potting mix or garden soil)
- Lemongrass cuttings
- Scissors or a utility knife
- Drill or a sharp object (to make drainage holes)
- Water
Step-by-Step Guide
Step 1: Prepare Your Bottles
- Clean the bottles: Rinse them thoroughly to remove any residual liquid or chemicals.
- Cut the bottles: Using scissors or a utility knife, carefully cut a bottle in half. The top part will be your planter, while the bottom one can be used for drainage or as a reservoir.
Step 2: Create Drainage Holes
- Make drainage holes: Take the bottle that will serve as the planter (the top half) and use the drill or sharp object to poke holes in the bottom. This step is crucial to avoid waterlogging your plants.
Step 3: Add Soil and Plant Your Lemongrass
- Fill with soil: Add potting mix until it’s about two-thirds full.
- Insert the lemongrass cuttings: Place the cuttings in the soil, ensuring they are at least an inch deep. You can use stalks you purchase from the grocery store as cuttings.
- Water gently: Once planted, give your new lemongrass a gentle drink, making sure the soil is moist but not soaked.
Step 4: Position Your Planter
- Choose a location: Place your homemade planter in a sunny spot indoors or outdoors where it will receive light for most of the day.
- Monitor growth: Check the soil moisture daily—water as needed, ensuring it stays damp but not overly saturated.
Expected Results
In a few weeks, you’ll start to notice green shoots sprouting from your lemongrass cuttings. With regular watering and plenty of sunlight, you can expect to harvest fresh lemongrass stalks within two to three months. Not only can you enhance your recipes, but also enjoy the fresh aroma of this delightful herb in your home!
Extra Tips
- Fertilization: After a month, consider adding a diluted liquid fertilizer to kickstart growth.
- Pruning: Regularly trim the tops of your lemongrass to encourage bushier growth.
- Companion planting: If you have more space, consider growing mint or basil alongside your lemongrass for a fragrant herb garden!
Conclusion
Creating your own DIY lemongrass planter using plastic water bottles is not only simple and cost-effective but also a fun way to connect with nature from the comfort of your home. Every time you reach for a stalk of lemongrass, you’ll remember the effort you put into nurturing it. So gather your materials, roll up your sleeves, and let’s get gardening! Your taste buds will thank you!